Search within this blog:

Custom Search

Tuesday, August 17, 2010

iPhone: Change From ver. 3.1.2 to 3.1.3 Without Update The Firmware

Here is some trick that can let us have firmware 3.1.3 without updated it.

Why? Maybe some of us already used to 3.1.2 and feel comfortable with it but sometimes there is some APPS or GAMES that required 3.1.3 and we do not really want to update our iPhone to 3.1.3 because in some countries, when you have updated the firmware you will need to find a way to unlock it again. For Malaysia & Singapore users, we do not have that kind of problem because the iPhone we get is completely unlock version. So we no need to worry about the unlock things.

Alright~~~ What we need to do that:

1. Jailbroken iPhone 3.1.2 using Blackra1n & with Cydia installed in it.
2. Internet connection.


Lets get started! Now you can see my iPhone details are like following.


When I tried to install a game, it required me to have 3.1.3, as below.


Follow the steps below to gain the 3.1.3 without updating it & the modem baseband.


Step 1: Goto Cydia --> Manage --> Sources


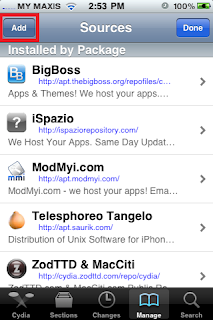
Step 2: At the Sources page, press the Edit button follow by Add button.


Step 3: Key in the source address as below & add it. Wait for the processes to complete.


Step 4: After press the Return to Cydia button, you will able to see the source we added just now.


Step 5: Select the source and scroll the page down until you found the Fake 3.1.3


Step 6: Select it & install it.


Step 7: After installation completed, let's check it out. Version updated but modem maintain the same!!


Step 8: To double confirm that, let's try to install the game just now.


DONE!!!!

Wednesday, August 11, 2010

How To Fix Missing ASL.dll File While Running Blackra1n

Some of you might have face this problem after update iTunes to version 9.1 or 9.2. The error message you got from the windows will look like this:


To solve this problem, just move the Blackra1n executable file to following location:

C:\Program Files\Common Files\Apple\Apple Application Support

After you have moved the Blackra1n, create a shortcut by send it to desktop for your own convenient.


Try run the Blackra1n shortcut from the desktop. It will work like normal again!!


DONE!!

Monday, August 9, 2010

Network Related Problems

Here is the lists of all the network related problems I have experienced before. If you think you have some network problems that cannot be solved, please leave a comment or send email to me and I will try my best to find out the solutions for you.


1. Failed to connect to a wireless router/access point with WPA2-Personal security settings.

Failed To Connect To A Wireless Router/Access Point With WPA2-Personal Security Settings

Last weekend, I was at my friend's house with my notebook together. I am using Lenovo R61 with Windows XP SP2 installed inside. While I tried to connect to his house wireless router, the system prompt out error message saying that there is unsupported security type and need me to configure the settings by myself, it has not yet even prompt out the password field to let me key in the secutity keys.

So, I tried to look into my friend's notebook that installed with Windows Vista SP1, checking out what kind of security type is he using to configure his wireless router. Finally, I found out that is this: WPA2-Personal-AES. I went back to my notebook, look into the settings and found out that my OS does not support this security type. Since this is the first time I came across this problem, I have to borrow my friend's notebook to GOOGLE for the solution.

I type in the key words "WPA2-Personal" and GOOGLE it. The results came out in a lists but I decided to go for this one.


After read the article, I knew I need to get the Hot Fix KB893357 for my OS as mentioned inside but it request me to validate my OS whether it is a Genuine Microsoft Windows. You can see it by yourself in this:


Due to I am a lazy person and I don't like to go through all this steps. I decided to download the hot fix from other website - PCWORLD.com after I GOOGLE it, and I found the hot fix is able to download from here:


It took me not more than 30 seconds to complete the download. I double click to run the downloaded hot fix file and restart the computer after the installation finished. While I go into the wireless security settings again, BINGO~! I was able to see the WPA2-Personal appear inside and I was able to surf the internet all the way out!!

You can download the hot fix from here too!


Jailbreak iPhone 3GS (ver. 3.1.2) using Blackra1n

This jailbreak is a Tethered Jailbreak if you have new bootrom for your iPhone. No idea what is Tethered Jailbreak mean? Please go here.


What we need to do the jailbreak?

1. iPhone 3GS with ONLY ver. 3.1.2
2. Blackra1n (Thanks to GeoHot) - Windows / Mac
3. iTunes (recommended 9.0.x)

PS: I am using Windows 7 and it should have no problem on Windows XP & Vista.


Follow the steps below:

1. Download the Blackra1n jailbreak tools from above to your desktop.
2. You will see this icon when complete downloaded. Connect your iPhone with your computer now.


3. Double click Blackra1n.exe. Then press on the make it ra1n button when you see the following windows pop out.


4. The windows will then tell you that your iPhone is entering recovery mode.


5. While you are looking at your iPhone is in recovery mode, in less than 1 second time it has change to the image below. (We believe is GeoHot himself)


6. The next thing you will see in your computer is this windows pop up to tell you enjoy your jailbroken iPhone.


7. And the another previous windows will tell you the process is done and wait for your iPhone to reboot.


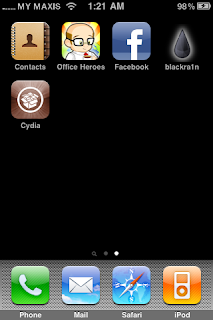
8. After your iPhone has reboot, you will able to see the Blackra1n in your iPhone.


9. We are now trying to install CYDIA into our iPhone. Press on the Blackra1n icon, then select Cydia and press the Install button. (If you need to unlock your iPhone, then just select sn0w too)


10. When the installation completed, you will see the Cydia icon in your iPhone. DONE!!

Sunday, August 8, 2010

Please Read This Before Go For The Jailbreak

First of all, I would like to make things clear. For so many times, I have jailbreak and restore my iPhone 3GS, and it is still alive. In case anything happened to your iPhone, I shall take no responsibilities on that. So, if you have no idea on what you are trying to do now, please leave this page immediately.

OK! Seems like you want to try this out. Then let us get started!

I would like to tell you about my iPhone details first and hope that we have the same model. Why? That will increase the percentage for successful jailbreak your iPhone.

iPhone 3GS
Version - 3.1.2 (7D11)
Model - MC131MY
Modem Firmware - 05.11.07

You can go to your iPhone --> Settings --> General --> About to find out all the details above.


Besides that, there is another thing that you need to know. That is: Tethered Jailbreak & Un-tethered Jailbreak. You could read the articles from below links to understand that!


1. Tethered vs. Un-tethered by www.everythingicafe.com
2. Tethered Jailbreak FAQ by forums.macrumors.com

Friday, August 6, 2010

How To Create iTunes Account Without Using Credit Card

When we have an iPhone, for sure we will download lots and lots of games and applications into it from the APP Store. Before we able to do that, it will require us to have an APPLE ID or iTunes Account to purchase all those APPS but don’t worry because inside there also has lots of FREE APPS.

To create an APPLE ID, please follow these steps, please make sure you are connected to the internet:


1. Touch once on the App Store in your iPhone.

.


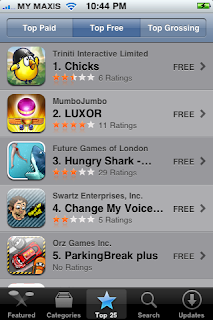
2. Goto --> Top 25, then Top Free. Select any of the showing APPS.


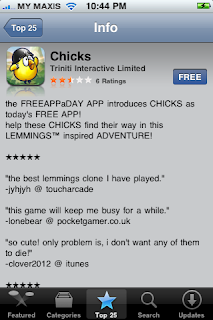
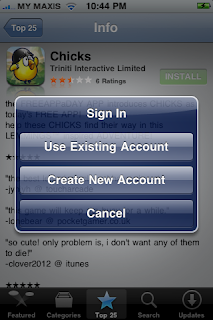
3. For this example, I have chosen Chicks. Click on the Free button & again on the Install button.


4. The iTunes will pop out a message request you to sign in, this is where we really begin. Click on Create New Account button.


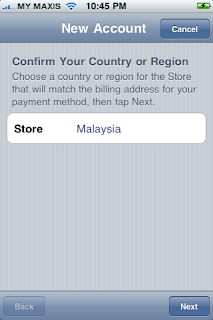
5. Click Next when come to page below.


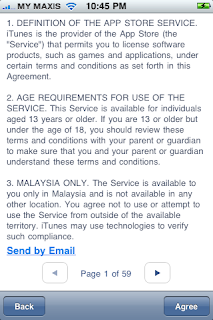
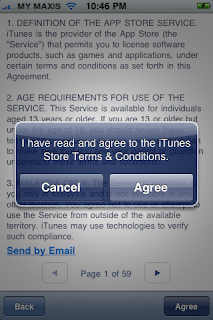
6. Then you will come to T&C and Privacy Policy page. Use your fingertip and move to the bottom and click Agree button. Of course if you want to read all that, please go ahead. =)


7. Fill in the details that requested and click Next to continue. Remember the email address (APPLE ID) and password for sure!


8. We are almost done! Click on the Payment Card - Visa and select None for that.


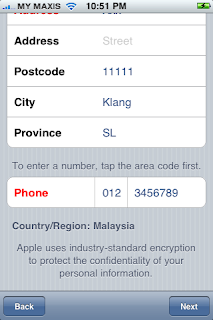
9. Please fill in all the field at there because is neccessary and click Next button. You see the RED color words? because I wasn't fill in just now.


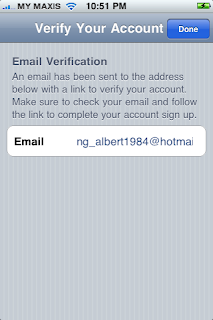
10. Done! However you need to go to your email's inbox and verify it before you can actually use that. After you have your email address verified, then you can start using the App Store. Enjoy!


Search the Web