Search within this blog:

Custom Search
Showing posts with label iPhone. Show all posts

Tuesday, May 17, 2011

Change Your iPhone Root Password To Prevent Hacked - IOS 4.x

I guess many friends already jailbreak their iPhone but do you realize that once your iPhone is jailbroken, there is a high chances that your iPhone will be easily hacked by other people? or infected by viruses? There was a case where a Australian teenager create a virus that change iPhone's wallpaper when it is infected but the virus did not cause any serious damage for the iPhone. I remembered it happened more than 1 year ago and my iPhone got infected too! 

You can read the news from the links below if you want to know more about it.

Link 1
Link 2
Link 3

I assumed that you already read those news and plan to change your iPhone root password. So this is how we going to do it:

If you are having IOS version 4.x, please follow the instructions below; if you are still having IOS version 3.x, please go here.

IOS ver. 4.x

1. Go to Cydia --> Manage --> Sources.


 2. Press on "Edit", then "Add".


3. Key in this URL into the pop out box. http://h7v.org, then press "Add Source".


4. Let Cydia verify the URL source, when a warning message pop out, just press "Add Anyway".


5. We will have this new source "Banned iPhone".


6. Inside Cydia and search for Mobile Terminal iSO4.


7. Install the Mobile Terminal.


8. Run the Mobile Terminal from your iPhone SpringBoard.


9. Type "su root", press "return" and provide the password. Default password: "alpine". (You won't able to see the letters you keyed in, so make sure you key in the password correctly.)

 
Chang the root password.
10. Type "passwd" then press "return".


11. Type in your new password for twice and press "return". (You won't able to see the letters you keyed in, so make sure you key in the password correctly.)


Change the mobile password. (This is the regular user account on the device)
12. Type "passwd mobile" and press "return".


13. Repeat step 11.


Close Mobile Terminal.
14. DONE!

Change Your iPhone Root Password To Prevent Hacked - IOS 3.x

I guess many friends already jailbreak their iPhone but do you realize that once your iPhone is jailbroken, there is a high chances that your iPhone will be easily hacked by other people? or infected by viruses? There was a case where a Australian teenager create a virus that change iPhone's wallpaper when it is infected but the virus did not cause any serious damage for the iPhone. I remembered it happened more than 1 year ago and my iPhone got infected too! 

You can read the news from the links below if you want to know more about it.

Link 1
Link 2
Link 3

I assumed that you already read those news and plan to change your iPhone root password. So this is how we going to do it:

If you are still having IOS version 3.x, please follow the instructions below; if you are having IOS version 4.x, please go here.

IOS ver. 3.x

1. Go to Cydia and search for Mobile Terminal.


2. Install the Mobile Terminal


3. Run the Mobile Terminal from your iPhone SpringBoard.


4. Type "su root", press "return" and provide the password. Default password: "alpine". (You won't able to see the letters you keyed in, so make sure you key in the password correctly.)

 
Chang the root password.
5. Type "passwd" then press "return".


6. Type in your new password for twice and press "return". (You won't able to see the letters you keyed in, so make sure you key in the password correctly.)


Change the mobile password. (This is the regular user account on the device)
7. Type "passwd mobile" and press "return".


8. Repeat step 6.


Close Mobile Terminal.
9. DONE!

Monday, May 16, 2011

Firmware for iPhone, iPad

Below are the firmware files that needed for upgrade or downgrade iPhone, iPad. Hope the lists below can make you easier to get what you need. 


iPhone 2G

2.0.0 (2G): iPhone1,1_2.0_5A347_Restore.ipsw
2.0.1 (2G): iPhone1,1_2.0.1_5B108_Restore.ipsw
2.0.2 (2G): iPhone1,1_2.0.2_5C1_Restore.ipsw
2.1.0 (2G): iPhone1,1_2.1_5F136_Restore.ipsw
2.2.0 (2G): iPhone1,1_2.2_5G77_Restore.ipsw
2.2.1 (2G): iPhone1,1_2.2.1_5H1_Restore.ipsw
3.0.0 (2G): iPhone1,1_3.0_7A341_Restore.ipsw
3.0.1 (2G): iPhone1,1_3.0.1_7A400_Restore.ipsw
3.1.0 (2G): iPhone1,1_3.1_7C144_Restore.ipsw
3.1.2 (2G): iPhone1,1_3.1.2_7D11_Restore.ipsw
3.1.3 (2G): iPhone1,1_3.1.3_7E18_Restore.ipsw


iPhone 3G

3.0.0 (3G): iPhone1,2_3.0_7A341_Restore.ipsw
3.0.1 (3G): iPhone1,2_3.0.1_7A400_Restore.ipsw
3.1.0 (3G): iPhone1,2_3.1_7C144_Restore.ipsw
3.1.2 (3G): iPhone1,2_3.1.2_7D11_Restore.ipsw
3.1.3 (3G): iPhone1,2_3.1.3_7E18_Restore.ipsw
4.0.0 (3G): iPhone1,2_4.0_8A293_Restore.ipsw
4.0.1 (3G): iPhone1,2_4.0.1_8A306_Restore.ipsw
4.0.2 (3G): iPhone1,2_4.0.2_8A400_Restore.ipsw
4.1.0 (3G): iPhone1,2_4.1_8B117_Restore.ipsw
4.2.1 (3G): iPhone1,2_4.2.1_8C148_Restore.ips


iPhone 3GS

3.0.0 (3GS): iPhone2,1_3.0_7A341_Restore.ipsw
3.0.1 (3GS): iPhone2,1_3.0.1_7A400_Restore.ipsw
3.1.0 (3GS): iPhone2,1_3.1_7C144_Restore.ipsw
3.1.2 (3GS): iPhone2,1_3.1.2_7D11_Restore.ipsw
3.1.3 (3GS): iPhone2,1_3.1.3_7E18_Restore.ipsw
4.0.0 (3GS): iPhone2,1_4.0_8A293_Restore.ipsw
4.0.1 (3GS): iPhone2,1_4.0.1_8A306_Restore.ipsw
4.0.2 (3GS): iPhone2,1_4.0.2_8A400_Restore.ipsw
4.1.0 (3GS): iPhone2,1_4.1_8B117_Restore.ipsw
4.2.1 (3GS): iPhone2,1_4.2.1_8C148a_Restore.ipsw
4.3.0 (3GS): iPhone2,1_4.3_8F190_Restore.ipsw
4.3.1 (3GS): iPhone2,1_4.3.1_8G4_Restore.ipsw
4.3.2 (3GS): iPhone2,1_4.3.2_8H7_Restore.ipsw 
4.3.3 (3GS): iPhone2,1_4.3.3_8J2_Restore.ipsw


iPhone 4

4.0.0 (4): iPhone3,1_4.0_8A293_Restore.ipsw
4.0.1 (4): iPhone3,1_4.0.1_8A306_Restore.ipsw
4.0.2 (4): iPhone3,1_4.0.2_8A400_Restore.ipsw
4.1.0 (4): iPhone3,1_4.1_8B117_Restore.ipsw
4.2.1 (4): iPhone3,1_4.2.1_8C148_Restore.ipsw
4.2.6 (4 CDMA): iPhone3,3_4.2.6_8E200_Restore.ipsw
4.2.7 (4 CDMA): iPhone3,3_4.2.7_8E303_Restore.ipsw
4.2.8 (4 CDMA): iPhone3,3_4.2.8_8E401_Restore.ipsw

4.3.0 (4 GSM): iPhone3,1_4.3_8F190_Restore.ipsw
4.3.1 (4 GSM): iPhone3,1_4.3.1_8G4_Restore.ipsw
4.3.2 (4 GSM): iPhone3,1_4.3.2_8H7_Restore.ipsw
4.3.3 (4 GSM): iPhone3,1_4.3.3_8J2_Restore.ipsw


iPad1

3.2.0: iPad1,1_3.2_7B367_Restore.ipsw
3.2.1: iPad1,1_3.2.1_7B405_Restore.ipsw
3.2.2: iPad1,1_3.2.2_7B500_Restore.ipsw
4.2.1: iPad1,1_4.2.1_8C148_Restore.ipsw
4.3.0 (iPad 1): iPad1,1_4.3_8F190_Restore.ipsw
4.3.1 (iPad 1): iPad1,1_4.3.1_8G4_Restore.ipsw
4.3.2 (iPad 1): iPad1,1_4.3.2_8H7_Restore.ipsw
4.3.3 (iPad 1): iPad1,1_4.3.3_8J3_Restore.ipsw


iPad2

4.3.0 (iPad 2 Wi-Fi): iPad2,1_4.3_8F191_Restore.ipsw
4.3.0 (iPad 2 GSM): iPad2,2_4.3_8F191_Restore.ipsw
4.3.0 (iPad 2 CDMA): iPad2,3_4.3_8F191_Restore.ipsw
4.3.1 (iPad 2 Wi-Fi): iPad2,1_4.3.1_8G4_Restore.ipsw
4.3.1 (iPad 2 GSM): iPad2,2_4.3.1_8G4_Restore.ipsw
4.3.1 (iPad 2 CDMA): iPad2,3_4.3.1_8G4_Restore.ipsw
4.3.2 (iPad 2 Wi-Fi): iPad2,1_4.3.2_8H7_Restore.ipsw
4.3.2 (iPad 2 GSM): iPad2,2_4.3.2_8H7_Restore.ipsw
4.3.2 (iPad 2 CDMA): iPad2,3_4.3.2_8H8_Restore.ipsw
 
4.3.3 (iPad 2 Wi-Fi): iPad2,1_4.3.3_8J2_Restore.ipsw
4.3.3 (iPad 2 GSM): iPad2,2_4.3.3_8J2_Restore.ipsw
4.3.3 (iPad 2 CDMA): iPad2,3_4.3.3_8J2_Restore.ipsw


Friday, October 29, 2010

How To Check Warranty Status

After register warranty for iPhone, lets check the warranty status by doing 3 easy steps.


Step 1: Goto this link.


Step 2: Enter your iPhone Serial No. & click Continue button.


Step 3: You got all the status for your iPhone. Done!!


Thank you!!!

How To Register Warranty For iPhone

This post specially for friends from Lowyat forum that interested to my iPhone 3GS 32GB trade!! Thank you for your support~~!!

Let's go straight to the point. Please follow the steps below:


Step 2: Select the location & your preferred language. Then enter your Apple ID & password to continue.

*if you do not have one, please go here to learn how to create one using your iPhone.


Step 3: Choose how many product you want to register.


Step 4: Select your product category - iPhone


Step 5: Select iPhone 3GS


Step 6: Enter your Serial No. & other info.


Step 7: Double confirm then click Finish to complete the warranty registration.


Step 8: DONE!!


You might want to know how to check the warranty status.

Thank you!!

Thursday, October 14, 2010

How To Display iPhone Screen On Desktop

Normally I will show instructions on doing something steps by steps with postings the screen shots. Sometimes, I do feel irritating because of need to capture and upload many screen shots. This time, I spent some time and come out with this video. Hopefully will be helpful enough and don't too mind about my broken English!

Thank you and hope to get some support from you all!


Tuesday, October 12, 2010

VONAGE Mobile For Facebook: Call To Facebook's Friends For FREE!!

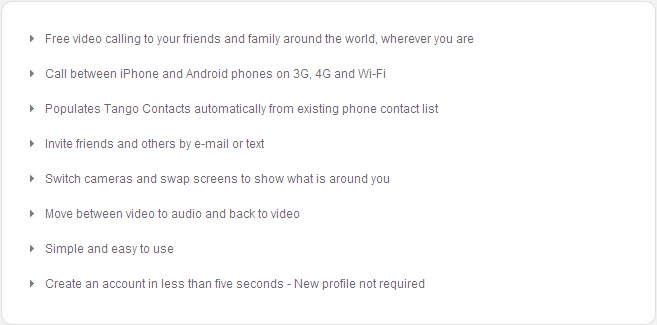
TANGO Video Calls, an app to make video call to friends using 3G/Wifi was introduced on last week. This week, I would like to introduce another FREE App that could make call to Facebook's friends.

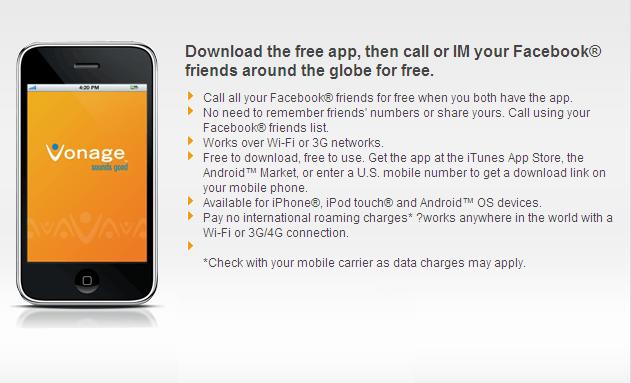
VONAGE Mobile for Facebook is an free app that developed by Vonage Mobile. The free app can be installed in iPhone, iPod Touch & Android OS devices (for iPad is coming soon). It can be used while the devices mentioned are connected to 3G/Wifi.

Let's see the features of it!


We know that Vonage Mobile for Facebook is actually similiar to the Tango Video Calls but there are also few things that different between these two free app:

1. Tango compatible with iOS4 and above. Vonage compatible with iOS3.1 and above.
2. Tango able to make video call. Vonage does not.
3. Tango access to our phonebook. Vonage access to our Facebook, no numbers needed.
4. Tango not allow to disable the 3G service. Vonage allow that to prevent carrier data charges.
5. Tango allow using email/sms to invite friends. Vonage need you to go to their website to do that.

So that you have know the features about Vonage Mobile for Facebook and also differences between Tango Video Calls. Which one would you choose to communicate with your friends & family more? 

Updated (15 Oct 2010): Yesterday night I tested Vonage by calling one of my friend in Facebook. Of course we are both using Wifi & we are in Malaysia. The call was clear and no lagging at all~~! I was trying to call another friend at Australia but something not right and we not able to call to each other, so stay tuned and I will keep you all updated!!

Monday, October 4, 2010

TANGO: A New Way To Make Calls

This morning, as usual I took out my iPhone and went into the App Store to look for new app. Under the Top Free Category of Top 25, I saw an icon in orange color that attracted and stopped me from scrolling down.

So, I found this app name TANGO that I would like to introduce to all the smart phone users. I have installed it into my iPhone but I have no chance to test it out yet because there is no one in my contacts that having this app.


Any way, there is nothing to worry about because very soon many of you who are reading this will going to have it in your iPhone. Let us see what can this TANGO do:


After reading all the features, maybe many of you will start thinking: What about iPhone 3GS and others that do not have front camera to make video calls? Of course you still can use it to make a normal call!

Also to make you more clear about TANGO, I list out the following:

  • The person who you want to call to, must also have installed this app inside their phone, else you won't found them in your TANGO's contact list.
  • If you are going to make an international call, either you're in local or other country. Make sure you are connected to Wifi, else using the 3G services will cost you not cheap.
  • Not sure your phone is supported on this app, go here to find out.
  • For iPhone user, only IOS 4.x and above is supported.
  • Still not clear? Lets go to official website to find out more.

I hope you have at least know the basic of TANGO after reading this, if yes then why you are still here? Faster install this app into your phone now.  xD


Tuesday, September 28, 2010

iPhone 4 Malaysia: DIGI vs MAXIS

Recently the iPhone 4 had officially launched at Malaysia and make all trendy people crazy until today and will continue growing. I am also a bit crazy about iPhone 4 but luckily I am holding a previous model iPhone 3GS and that cool me down a little.

As we know, Maxis and Digi are the two service providers that selling iPhone 4 and also coming out with some interesting plans. After few days of researching, asking and understanding. I have come out with my own comparison between this two service provider's plan, but only choosing from 1 of their plan to discuss.

Before we proceed to the comparison table below, please understand the following:

1. M to M --- Maxis to Maxis.
2. to all --- to all network.


From the table above, we can find out that by subscribe to Digi's plan, we can save RM 9.70 for each month compare to Maxis's plan. In other way, we will save RM 232.60 in this two years. Not a big nor a small amount, depends how you think, but to some people they will still like to save this RM232.60.

Let us see from other way, the Free Voice Call that Digi provide is 200 minutes and Maxis is 333 minutes. If you are a person that call out more, please see this case:

Case 1:  You mis-judged and taken Digi's plan. You forgot that every month your total call out time is average 230 minutes, so the calculation will be - 
230 - 200 = 30 x RM 0.15
                 = RM 4.50 x 24 (2 years)
                 = RM 108

Results: You lost RM 108 from RM232.60 that you saved.


Case 2: You're on Maxis's plan. You use iPhone to send/receive email, using Facebook & Twitter to update your status, WhatsApp and Live Messenger to keep in touch with your friends, YouTube to watch interesting videos and share to your friends. You accidently over use your data exceeded 50MB = 50000KB. 

RM 0.05 per 10KB over use. Calculation will be - 50000/10 = 5000 x RM 0.05
                                                                                             = RM 250

Results: You need to pay extra RM 250 for that. Maybe it just happened only for one month but I think that will make you suffered for that month too! For this case, actually is a little unconvincing because now is a WiFi era. Almost every place has free WiFi even in the working place, so I think the 1GB internet data should be enough.

So, it is important that you have to know what is the thing you want and need it most. The cheaper iPhone price? More free voice calls? More free internet data? or better coverage perhaps! Do not ever listen and trust blindly to the sales person, we need to be a smart consumer.

Lastly, if you think there are something not right about this post and need a correction. Please do not hesitate to leave a comment to me. If you think you like my post, please subsribe and follow my blog. Thank you!


PS: For more details comparison between Digi & Maxis Plan please click here.

Tuesday, August 17, 2010

iPhone: Change From ver. 3.1.2 to 3.1.3 Without Update The Firmware

Here is some trick that can let us have firmware 3.1.3 without updated it.

Why? Maybe some of us already used to 3.1.2 and feel comfortable with it but sometimes there is some APPS or GAMES that required 3.1.3 and we do not really want to update our iPhone to 3.1.3 because in some countries, when you have updated the firmware you will need to find a way to unlock it again. For Malaysia & Singapore users, we do not have that kind of problem because the iPhone we get is completely unlock version. So we no need to worry about the unlock things.

Alright~~~ What we need to do that:

1. Jailbroken iPhone 3.1.2 using Blackra1n & with Cydia installed in it.
2. Internet connection.


Lets get started! Now you can see my iPhone details are like following.


When I tried to install a game, it required me to have 3.1.3, as below.


Follow the steps below to gain the 3.1.3 without updating it & the modem baseband.


Step 1: Goto Cydia --> Manage --> Sources


Step 2: At the Sources page, press the Edit button follow by Add button.


Step 3: Key in the source address as below & add it. Wait for the processes to complete.


Step 4: After press the Return to Cydia button, you will able to see the source we added just now.


Step 5: Select the source and scroll the page down until you found the Fake 3.1.3


Step 6: Select it & install it.


Step 7: After installation completed, let's check it out. Version updated but modem maintain the same!!


Step 8: To double confirm that, let's try to install the game just now.


DONE!!!!

Search the Web